My recipes are always pretty basic, but today's recipe is Betty Crocker basic.

In 1980 I received this as my first cookbook and it is still my go-to source for quite a few recipes today. As you can see I have used it a lot; pages have come out and certain recipe pages I use a lot are stained.
Every fall I make and freeze pies and I have had several people say they don't know how to make an apple pie. It's okay, I can't cut up a whole chicken to save my soul!
For those who want to try making an apple pie - here you go!

I like to use Gala apples. Honeycrisp are wonderful too, but more expensive. Just look for a baking apple at the store.
You can make homemade pie crusts. If you want my recipe for that search for my Apple Crisp Pizza recipe - it is included in that post. With the wonderful frozen and refrigerated pie crusts you can buy that are inexpensive I am more than happy to save time and use those rather than making homemade crust. I buy deep dish frozen crusts which come in the aluminum pans (usually a pack of 2) so they are ready to go. This also keeps me from using up every pie plate I have in the house! In addition I buy a package of refrigerated pie crusts (also in packs of 2) to use as the top crust. You have enough crusts with these to make 2, two-crust pies.
Here's the apple pie recipe I use from the Betty Crocker cookbook.
Apple Pie
Crust for 2-crust pie
(if using refrigerated crust, let come to room temp first so it is easy to unroll)
(if using refrigerated crust, let come to room temp first so it is easy to unroll)
3/4 cup sugar
1/4 cup flour
1/2 teaspoon ground nutmeg (I omit this)
1/2 teaspoon ground cinnamon
6 cups peeled, thinly sliced apples (about 6 medium)
2 T. margarine or butter

Take a frozen crust or a homemade crust placed in a pie plate. If you made your own crust don't worry about what to do with the edges yet, just press it into the pie plate on the bottom and sides, let the crust spill over the edge for now. Slice the apples into it. I don't measure by cup, I fill so the apples are mounding. They will cook down when baked, so fill it full.

Betty would tell you to combine the sugar, flour and cinnamon, and toss the apples in that mixture before putting in the crust. But I have never done that. I do exactly what my Mom always did. I sprinkle the sugar and flour over the apple slices. They will sift down and cook in nicely when baked.

Dot with the margarine or butter. Then sprinkle with the cinnamon.
(I never measure the cinnamon so if yours doesn't look quite as cinnamon-y that is why - if you love cinnamon like I do, add a bit more.)

Take one of the refrigerated crusts gently unrolled (or a homemade crust) and place on top. Take a knife and cut the excess off around the edges. I cut the top crust so it overlaps the bottom crust a bit - so you have a little extra to work with. If you made two homemade crusts, cut both at the same time, trimming just a bit bigger than the rim of the pie plate.
But save those scraps you cut off!!
But save those scraps you cut off!!
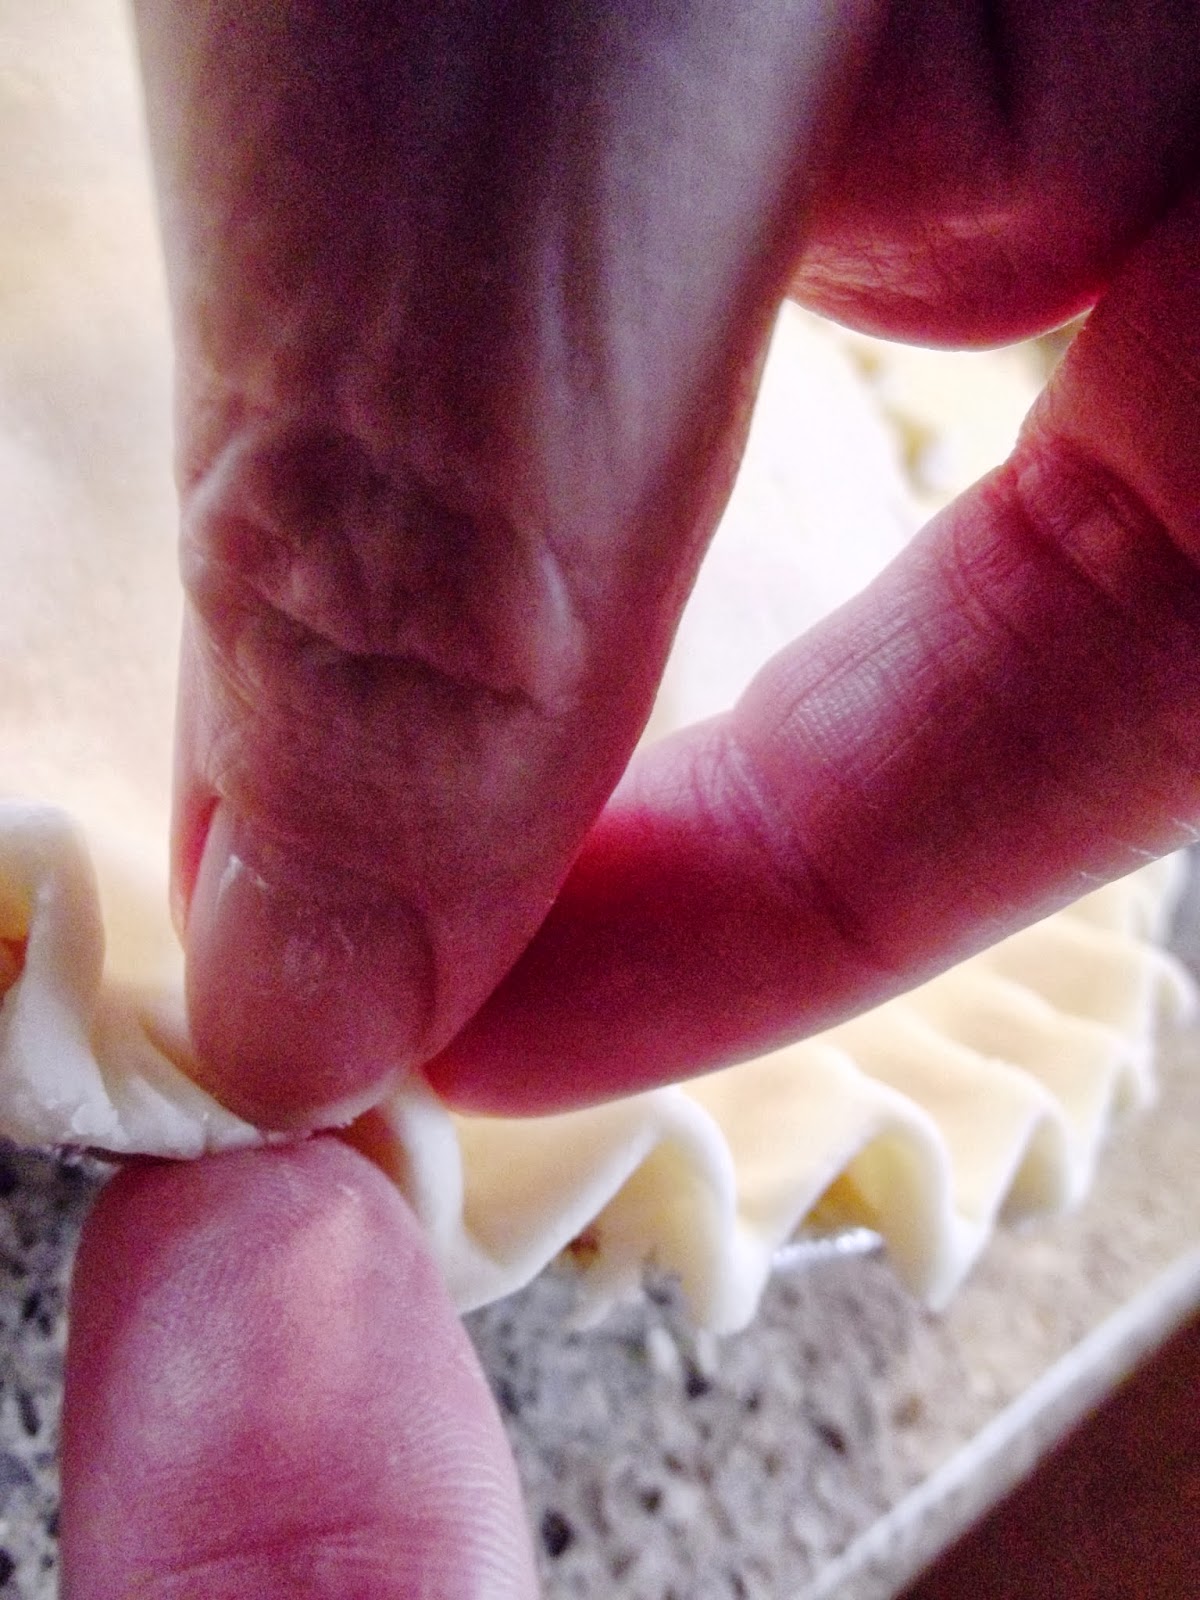
If you have enough crust on the edge, fold both under together, then pinch the top and bottom crusts together to seal them. If not much to work with, just pinch. It doesn't have to look perfect, the main thing is sealing them so the juices don't escape and make a mess during baking. I always have some juice that manages to creep out, but the better the seal the less juice you will lose.

Take a knife and make some cuts in the top crust so steam can escape while baking.
Whether you are going to bake right away or freeze, pour a little milk in the palm of your hand and then "baste" the top crust with this, just run your hand over the top crust lightly so it is completely covered with a little milk. Then sprinkle some sugar over the top crust - I am guessing I use about 1 Tablespoon.
If freezing, I use a 2-gallon Ziploc freezer bag, write the type of pie on it if needed (I have several kinds in the freezer at once so it is helpful to know what kind of pie I am getting out), put the pie in, and freeze. When you want to bake it, pull from the freezer and put right in the oven. Don't let the pie thaw.
If baking, bake at 425 degrees for 40-50 minutes. (When baking from frozen it takes a bit longer).
I suggest putting a foil-lined baking sheet on the rack under the one your pie is baking on to catch any juice... it's easier than cleaning the oven. Watch the edges of the pie so they don't burn - cover the edges with foil when they are starting to get brown so they don't get too dark. Bake until crust is golden brown and juice begins to bubble through the slits in the crust. I also put a fork through the slits to test the apples and make sure they are tender before removing from the oven.
I suggest putting a foil-lined baking sheet on the rack under the one your pie is baking on to catch any juice... it's easier than cleaning the oven. Watch the edges of the pie so they don't burn - cover the edges with foil when they are starting to get brown so they don't get too dark. Bake until crust is golden brown and juice begins to bubble through the slits in the crust. I also put a fork through the slits to test the apples and make sure they are tender before removing from the oven.
That's it!
Allow to cool a bit, cut a slice, add some vanilla ice cream, and you are in apple pie ala mode heaven!
Allow to cool a bit, cut a slice, add some vanilla ice cream, and you are in apple pie ala mode heaven!
But Wait!

Remember those strips of pie crust you cut off? Place them in a glass baking dish, dot with butter, and sprinkle with cinnamon and sugar. I use the cinnamon/sugar mixture we have made up for toast. Be generous with the butter and cinnamon/sugar.

Bake at 425 degrees, just like the pie. I have never really timed this, I just check them often. I am guessing this needs to bake about 15 minutes. You don't want them too dark, but you don't want the pie crust to be doughy either.

Pssssst.... I really enjoy this more than the pie!
Happy Friday!

.jpg)
We call the dough scraps fairies and my favorite too.
ReplyDeleteI have never heard them called that - love it!!!
DeleteThis comment has been removed by the author.
ReplyDelete